Tmux is a Terminal Multiplexer, which is just a fancy way of describing an organization tool for several terminals. Tmux manages a server which maintains several pseudoterminals, you can then connect to this server and work on those terminals. This is extremely useful when you’re working over SSH, because even if your SSH disconnects, the Tmux server running on the remote machine keeps the terminal sessions running and can be attached to again. Besides this, Tmux also makes it easy to arrange terminals for productivity. It will make more sense when you use it.
The source of all Tmux related knowledge is the Tmux man page. But it is huge! You can read articles or watch tutorials about Tmux, but I found most to be too shallow level. So I did some skimming of the man pages, and I think I have a better understanding of Tmux now. In this article, I’ll first go through a quick overview to showcase common functionalities and concepts of tmux, then I’ll go deeper into the command system and configurations.
Some warnings first. I’ve done all of the following in a Ubuntu 22 distribution, it should be similar for other Linux distros, cannot say the same for Windows or MacOS. But the core knowledge will be same. Secondly the screenshots I’ve attached are almost all zoomed, because otherwise it’ll be hard to look at. Additionally, my bash prompt is a bit customized. So the view won’t be same as what you see on your screen.
A quick overview of Tmux
To start with Tmux, you need to install it first. Check out Tmux wiki’s installing page for instructions. For ubuntu, it might be installed by default, you can run tmux --help in your terminal to be sure. Once installed, let’s run it and see what it does. Note the following instructions are meant to quickly showcase Tmux’s capabilities, they might not make sense now, but I will explain later. It’s also advised to follow along, I do provide screenshots, but doing the real thing is best.
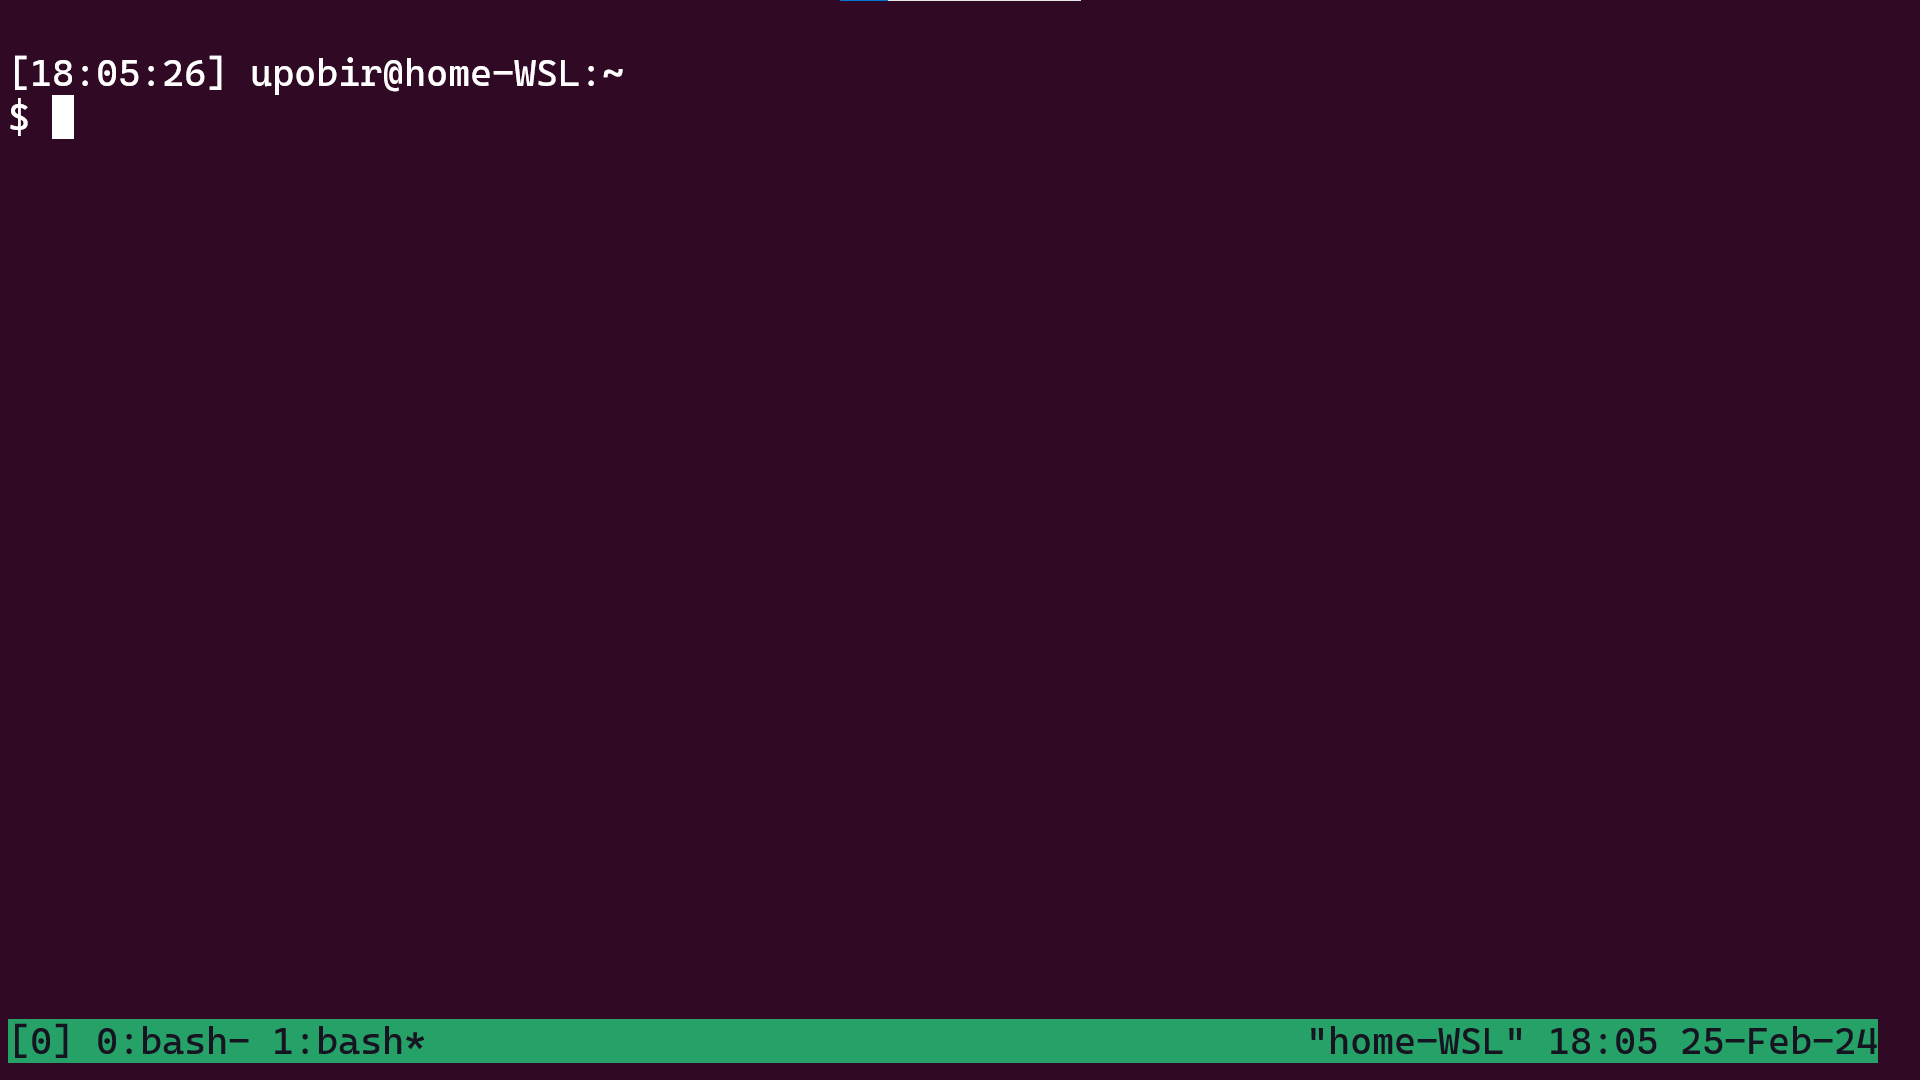
Tmux manages all the terminals by a server. To check that no Tmux server is running now, run tmux ls, you will see a output stating that no server is running. So to create a server, run tmux. At first it might seem like nothing happened, but you will note that your prompt has lost color (if it had color before and if this is a fresh new tmux installation) and there is a status bar in the bottom of terminal which has [0] 0:bash* written at left. This means you’re in Tmux now. With that tmux command, Tmux started the server, created a session, created a client instance and the client connected to that session. The sessions are collection of terminals that your client can attach to or detach from, these are managed by the server. The client is basically you interacting with session. The session we created just now is given default name of 0 which is why the status bar has [0] written. Right now you can use the tmux session just like a terminal, for example you can run echo I am using tmux now and it will do what it’d do in normal terminal.
 First Tmux session (zoomed)
Tmux sessions can have multiple windows which are like tabs. Right now you are in the window with 0 index, named bash. To create another window, first press ctrl+b, then press c. You will see that you are in a fresh terminal again, not showing the echo command you just did. You will also see that the status bar has changed a bit, it has [0] 0:bash- 1:bash* written now. This means you have two windows in this session, and you’re on the one with index 1, which has * beside it, the one with - beside it is the previous window you were on.
 After creating a new window (zoomed)
These bash names are not helpful. We will use another shortcut to rename the window, press ctrl+b (hereafter referred as C-b), then press ,, to get the prompt to rename window (in status bar). By the way, note that these shortcut always require pressing C-b first, this is the default prefix key, needed for all tmux shortcuts. Anyway, rename the window to be something like win1. To go back to first window, press the prefix (C-b), then press 0. We’re back at the old window with the echo command, rename this window to win0 (prefix, then ,).
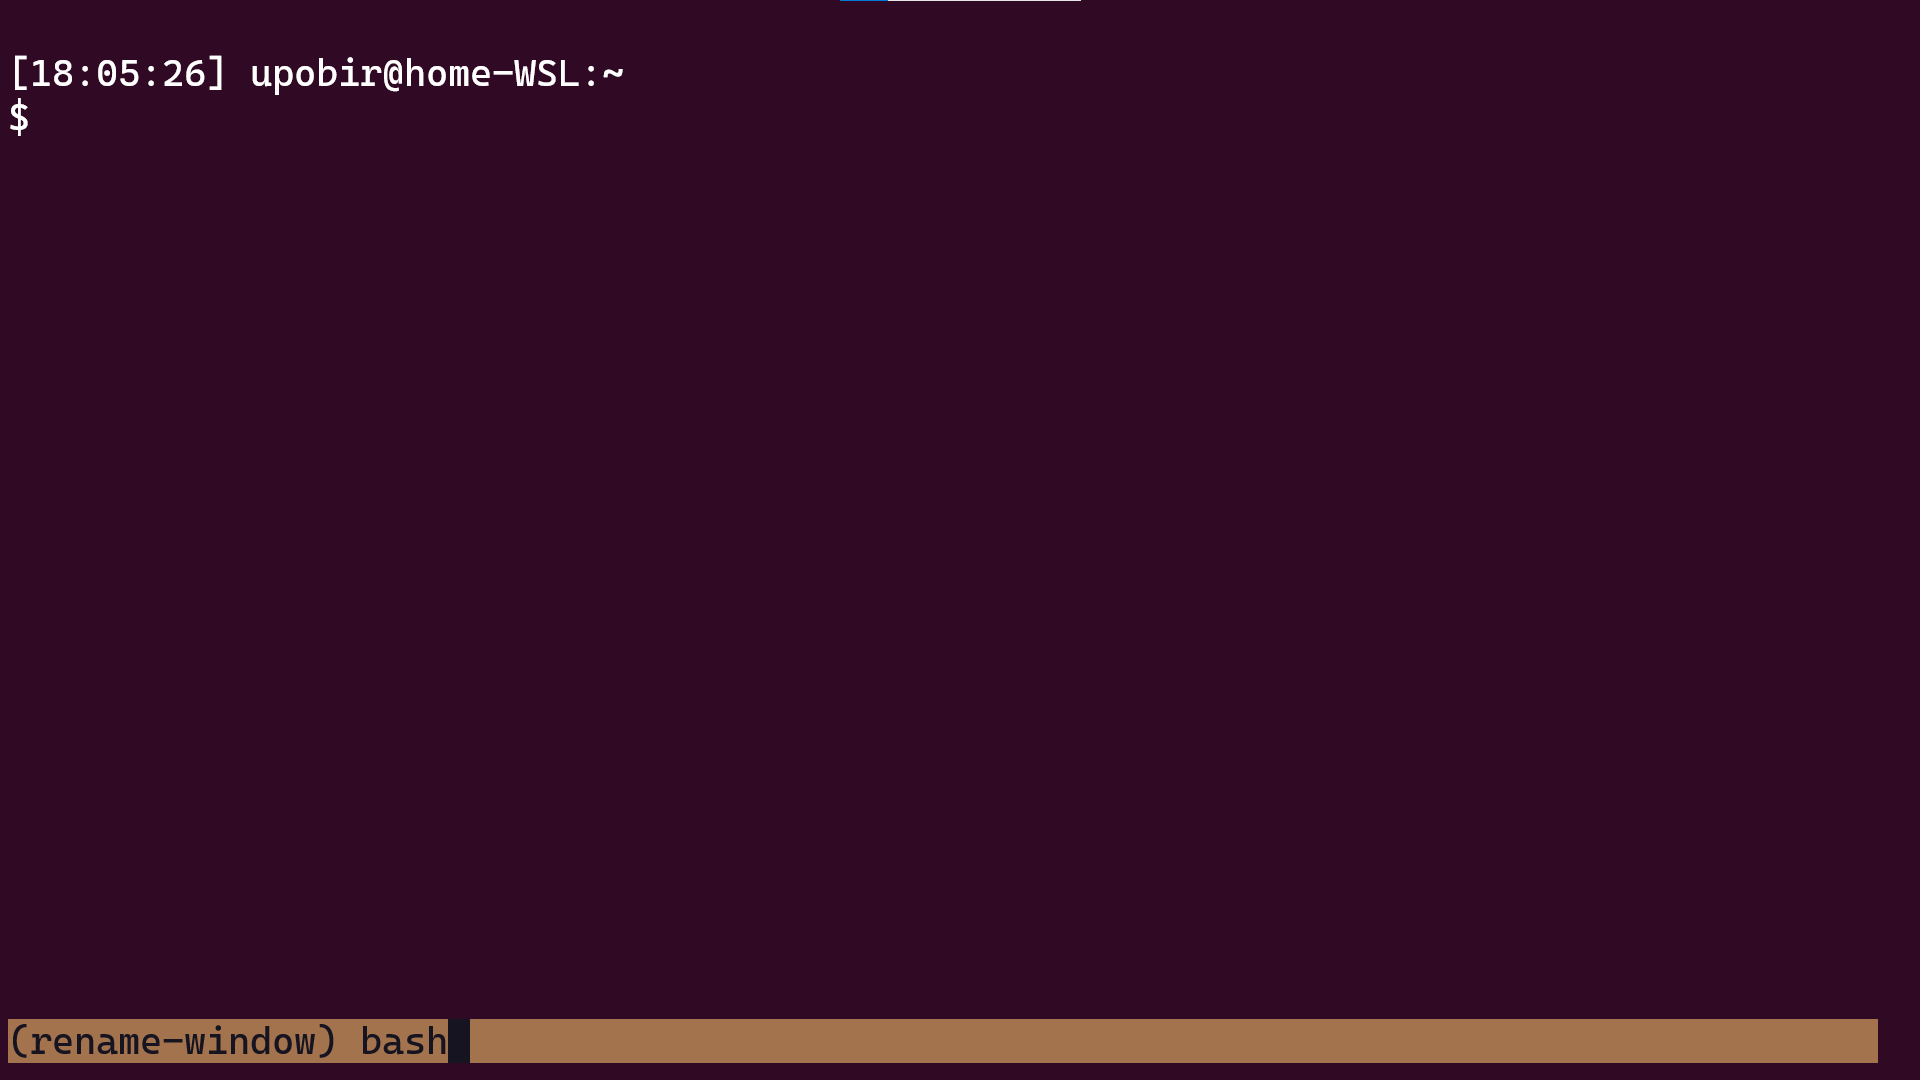 Window rename prompt (zoomed)
 Back at first window after renaming (zoomed)
Let’s also rename the session, the 0 name is boring. Press the prefix, then $. You will get the session renaming prompt, enter the name first. You could also have run tmux new -s first in the very beginning to start a session named first. After renaming, you’ll notice the status bar has [first].
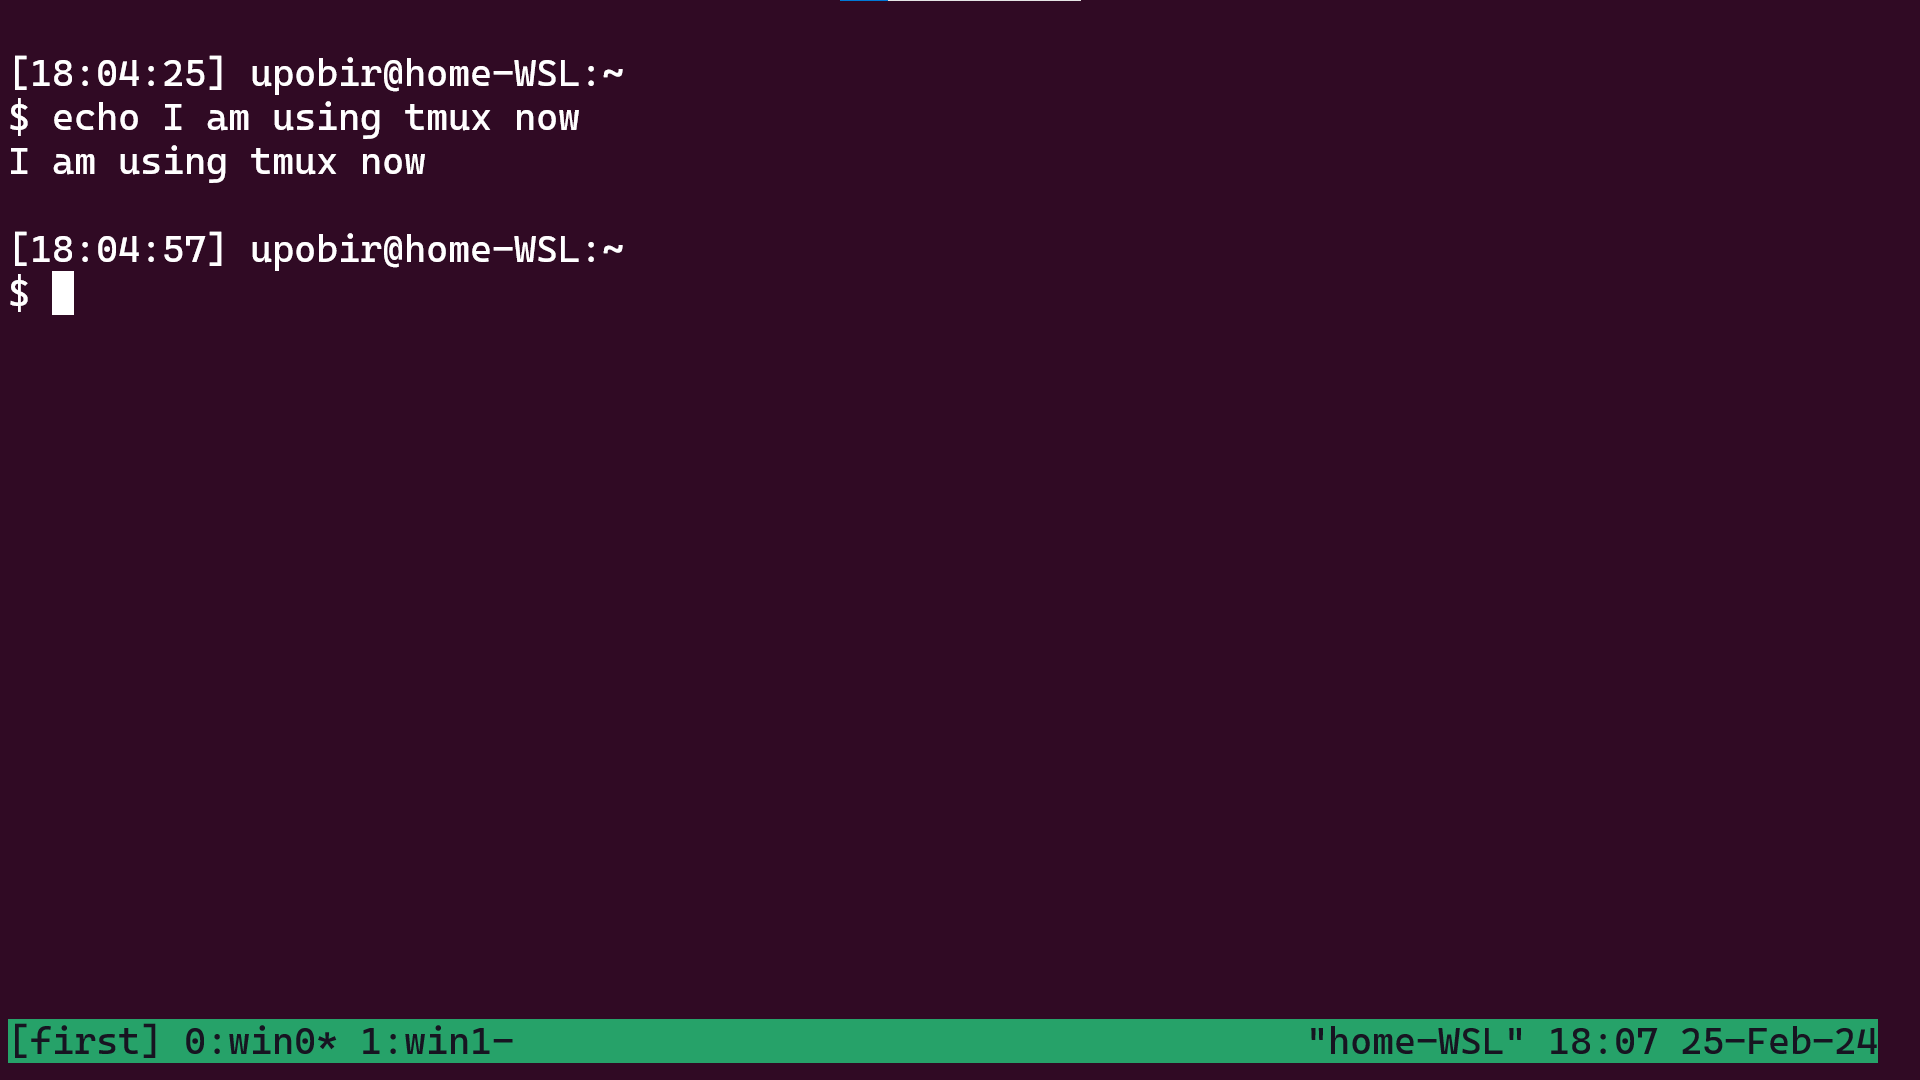 After renaming session (zoomed)
Let’s now detach from our session, by pressing prefix, then d. We are back to our normal terminal. What we just did is terminate the client, but the session is still functional, maintained by the server. If you run tmux ls, you will see output of first: 2 windows. So the session is still there, let’s try tmux again. Oh no, this is not our old session we see [1] 0:bash* in status bar, so it’s a new sesssion (named 1) with a new window. Windows always belong to one session, this window is different from the two windows of our old session. In fact you can run tmux ls while in this session, to see the list of two sessions: first and 1.
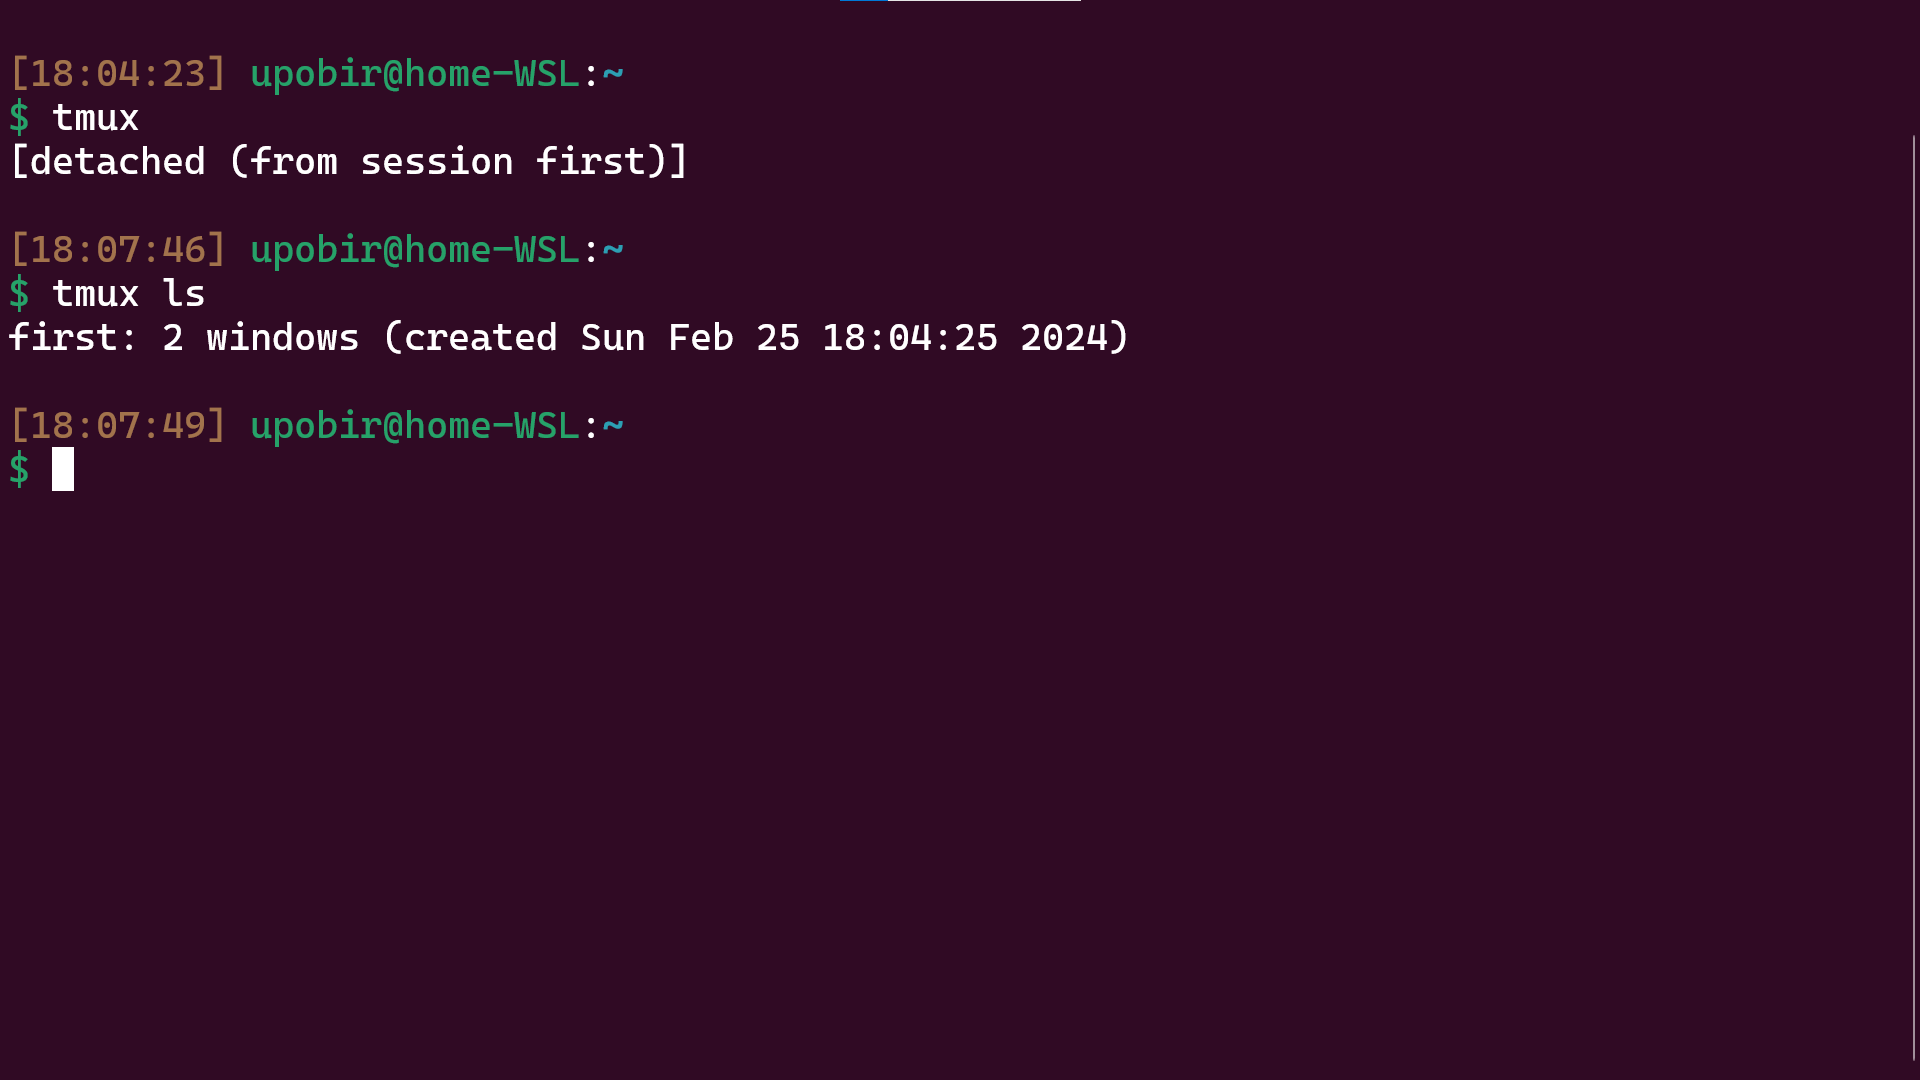 After detaching from your session (zoomed)
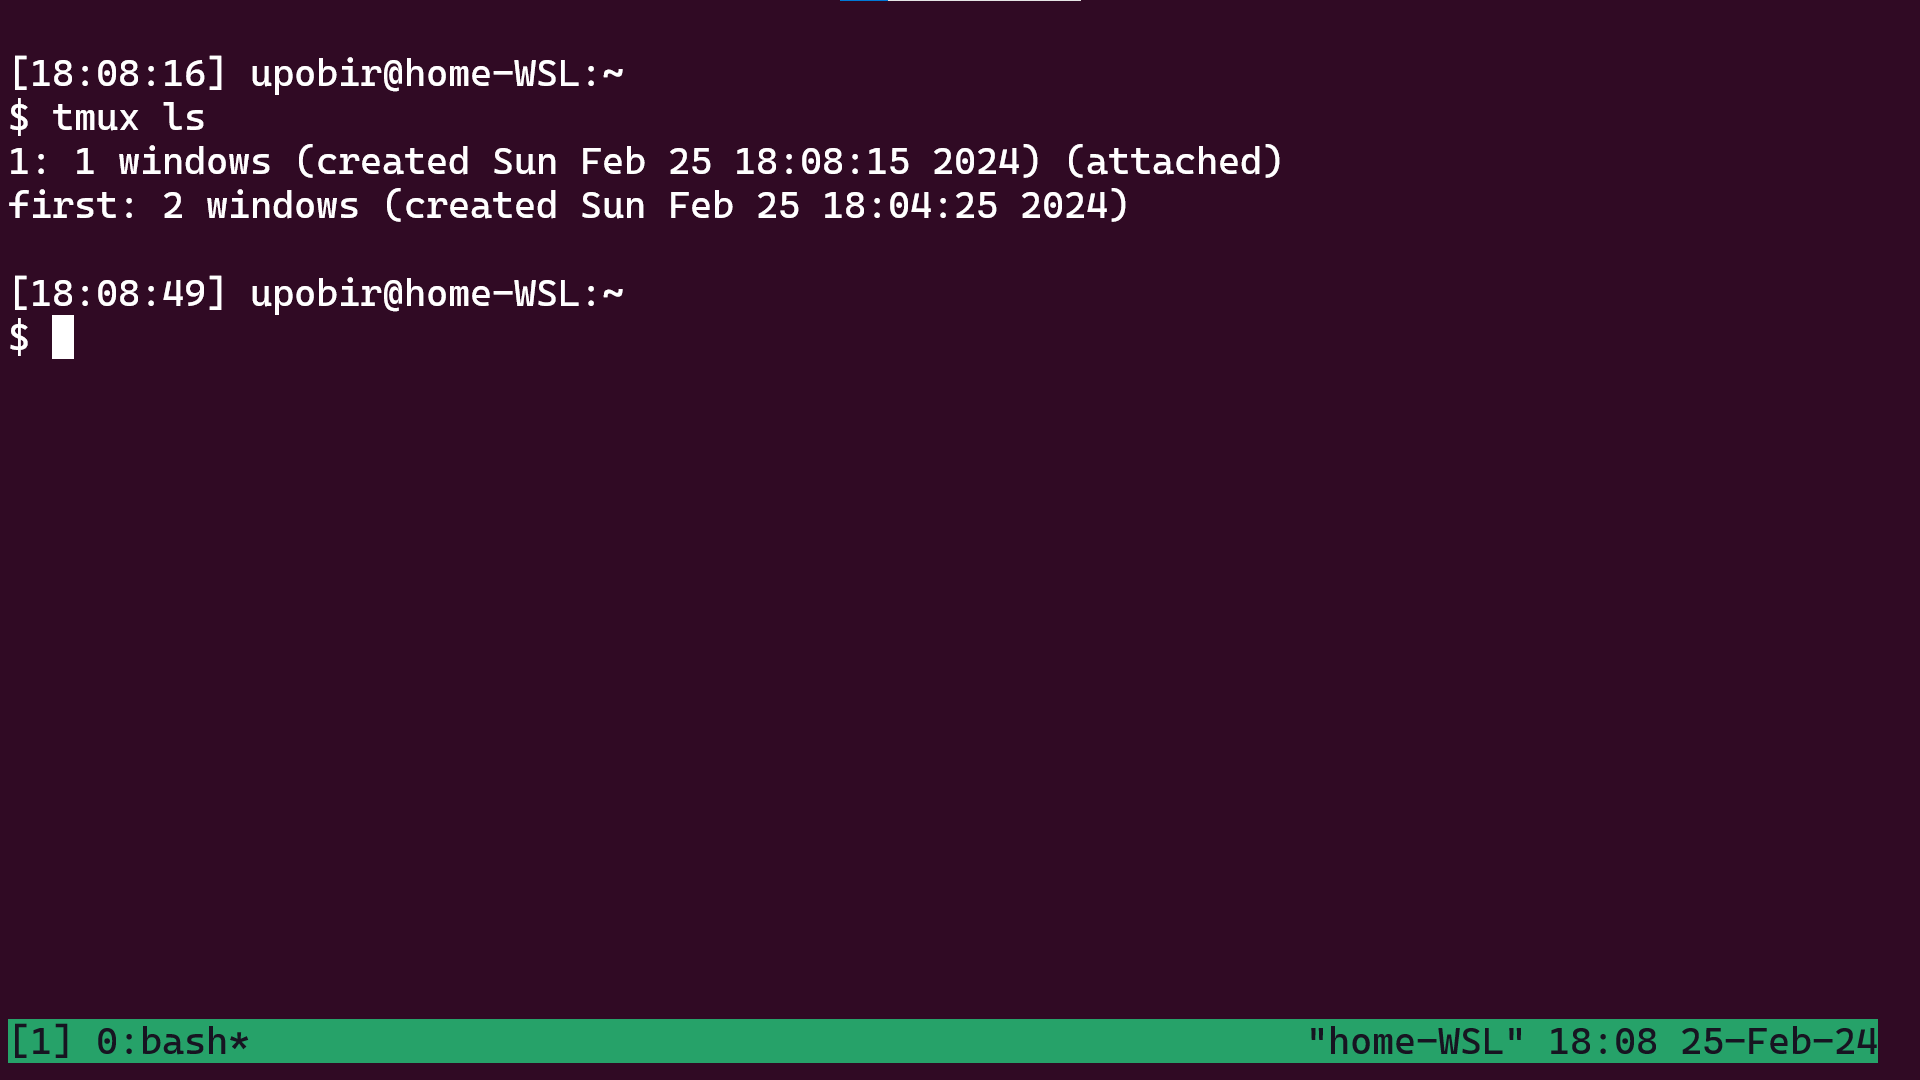 Inside the new session (zoomed)
Multiple sessions are useful, but we have no use for this now, let’s kill this session, killing has no shortcut by default, so we will have to use the command prompt. Press the prefix then press :, you will see a prompt in the status bar, write kill-session and press enter. And we are back to terminal. You can run tmux ls to see that we again have one session left. How do we get back to it? Run tmux attach or tmux attach -t first (the flag is not needed as by default the recent-most active session is attached to). And we are back to the old session!.
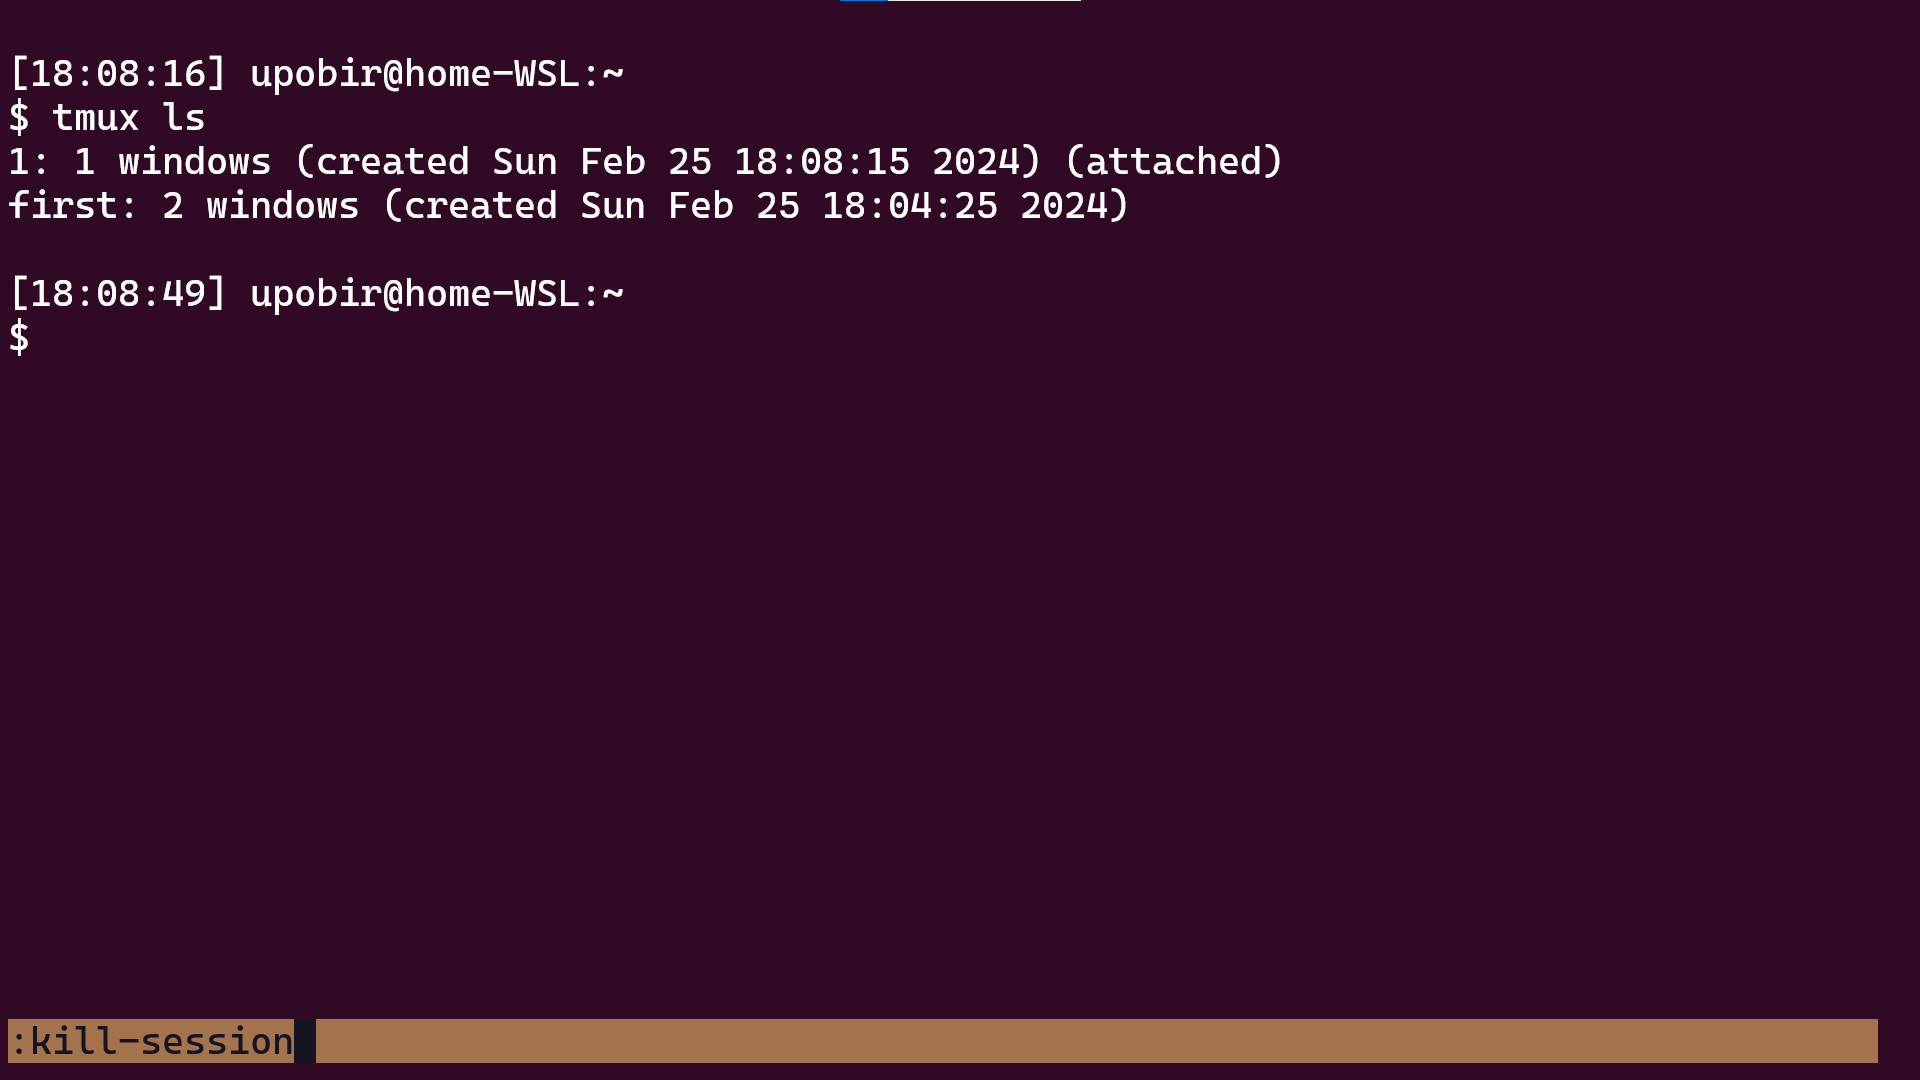 Killing your session (zoomed)
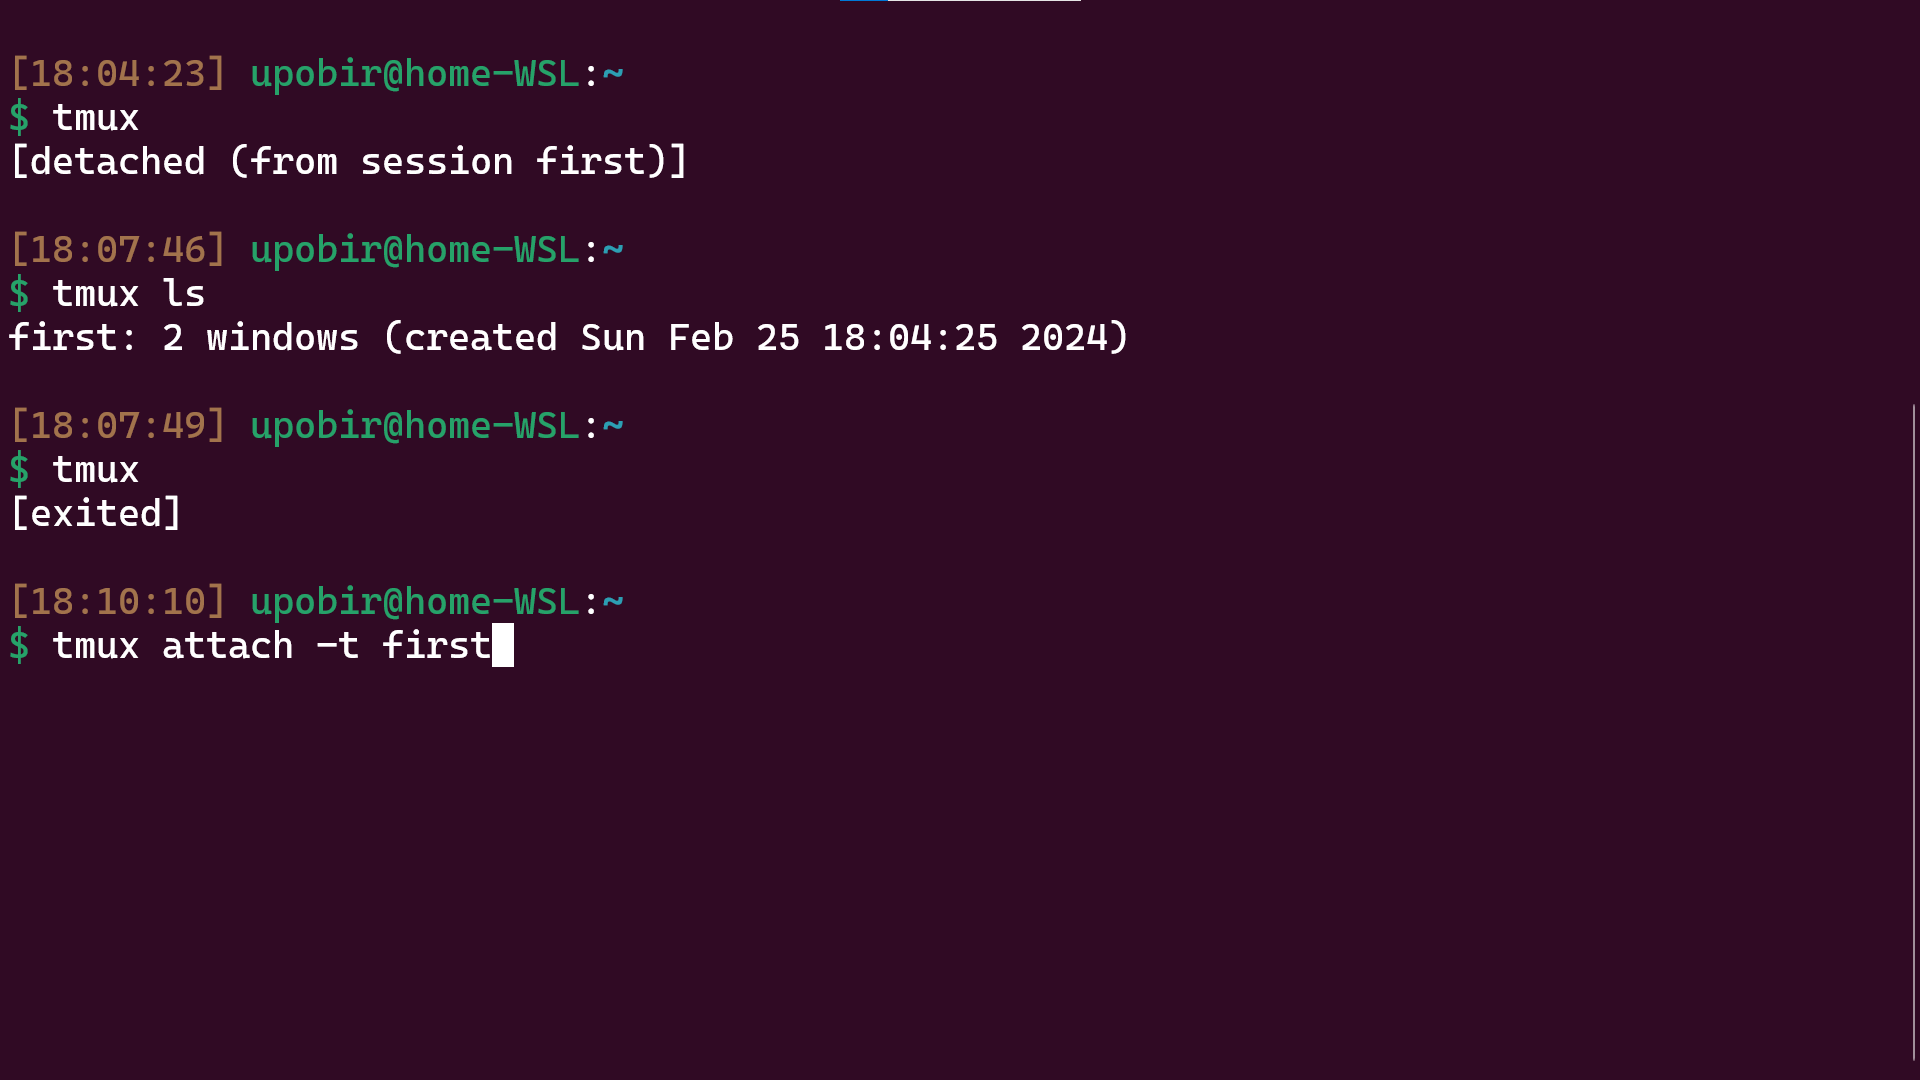 Attaching to your old session (zoomed)
Now let’s come to one of the fanciest features of Tmux, panes. A pane is the actual pseudo terminal you interact with. Panes take some part of the window they belong to. So far the windows we made all had one pane taking the entire space, let’s build several panes in the window we are at. Press the prefix, then % and voila! The window has two panes placed horizontally, you are on the right one (notice the cursor or how lower part of divider is green). Press prefix then ", now the right pane is divided into two panes vertically. In particular you can use these two shortcuts to keep dividing and creating new panes. To move around panes, press prefix then direction keys. To resize the panes, press prefix then press ctrl + <direction> (I actually just press direction while keeping the prefix pressed).
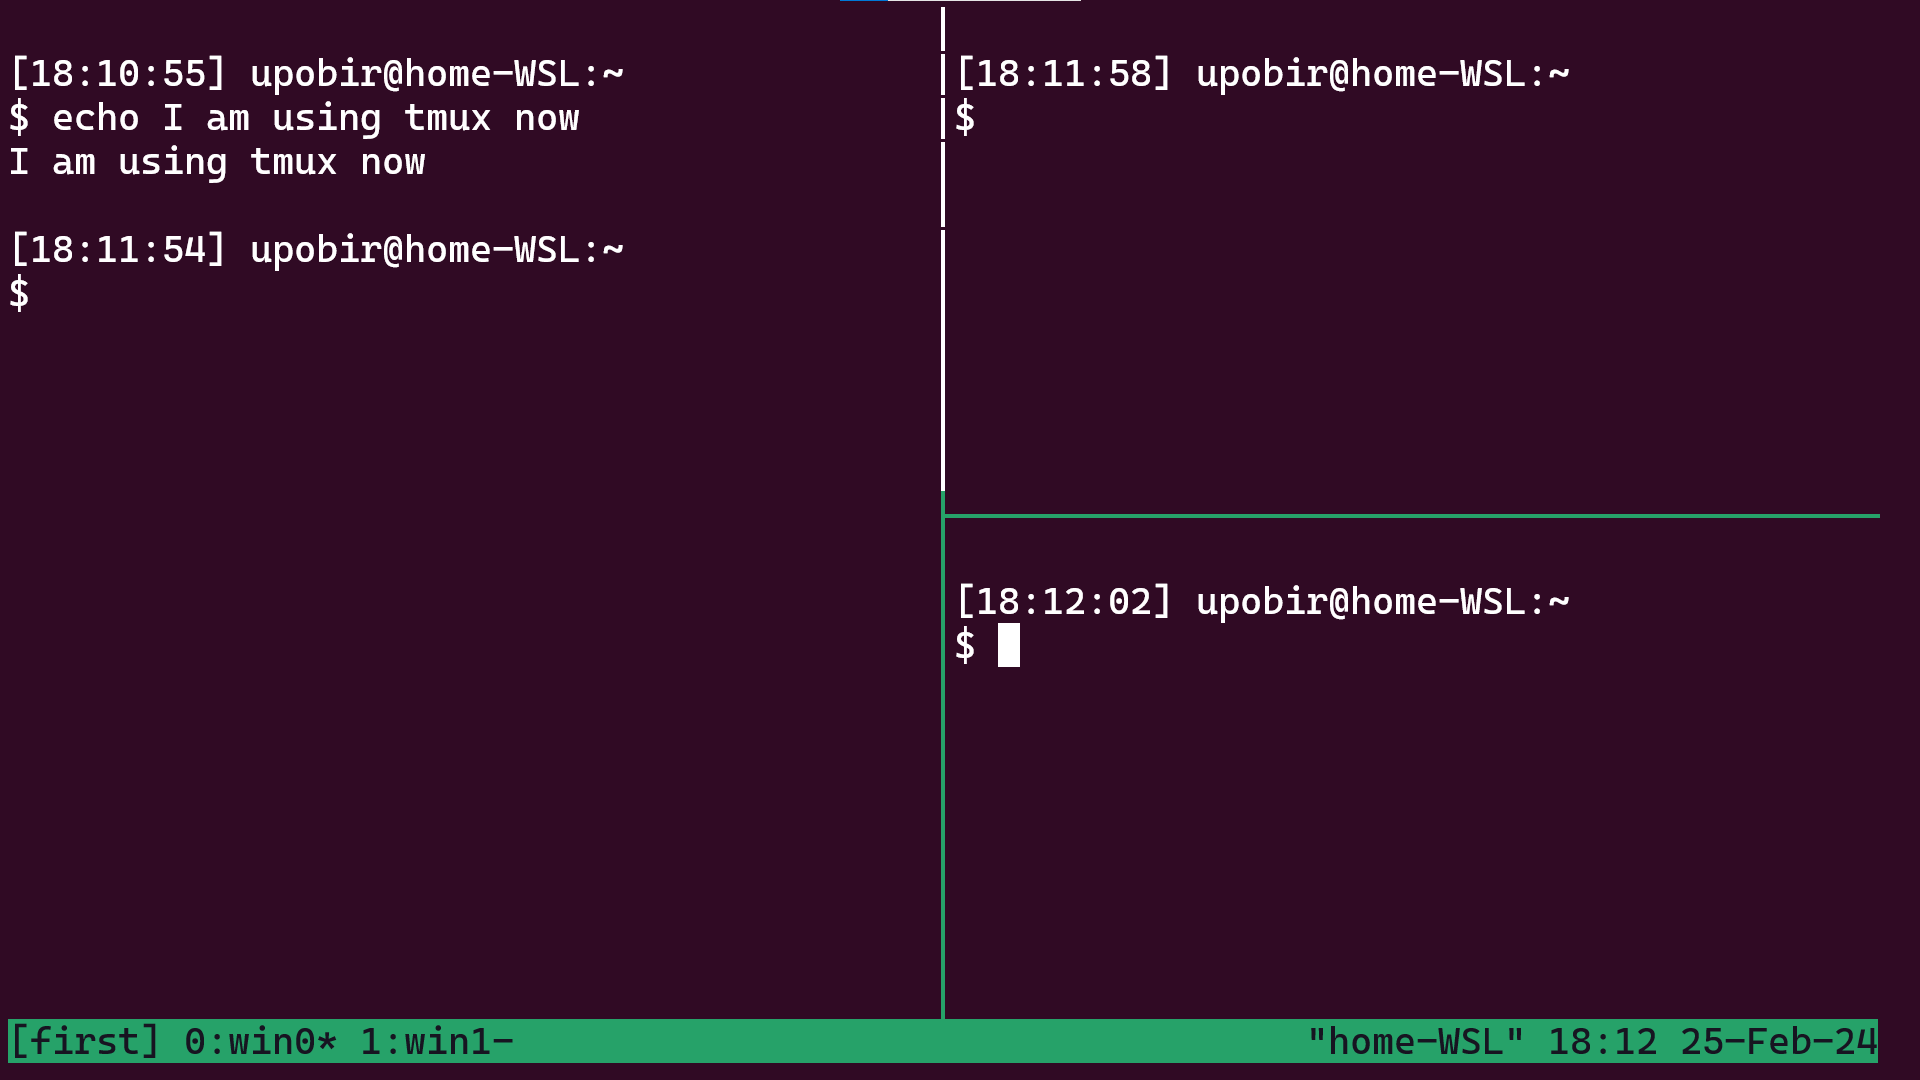 Several panes in the window (zoomed). Did you notice the continuity error ;)
What if we are done with a pane? We can kill a pane in two ways, either run exit in that pane, which is okay, but might be not possible, if for example you do not want to terminate current running program. For that press prefix, then press x, you will get prompt to kill current pane. And suppose you just want to kill the current window, then press the prefix, followed by &. I have already showed how to kill the session, but suppose you just want to kill the server (thus killing all sessions), then go to the command prompt (prefix, then :) and enter kill-server. The server would’ve terminated anyway when there are no sessions left, this is to kill all sessions.
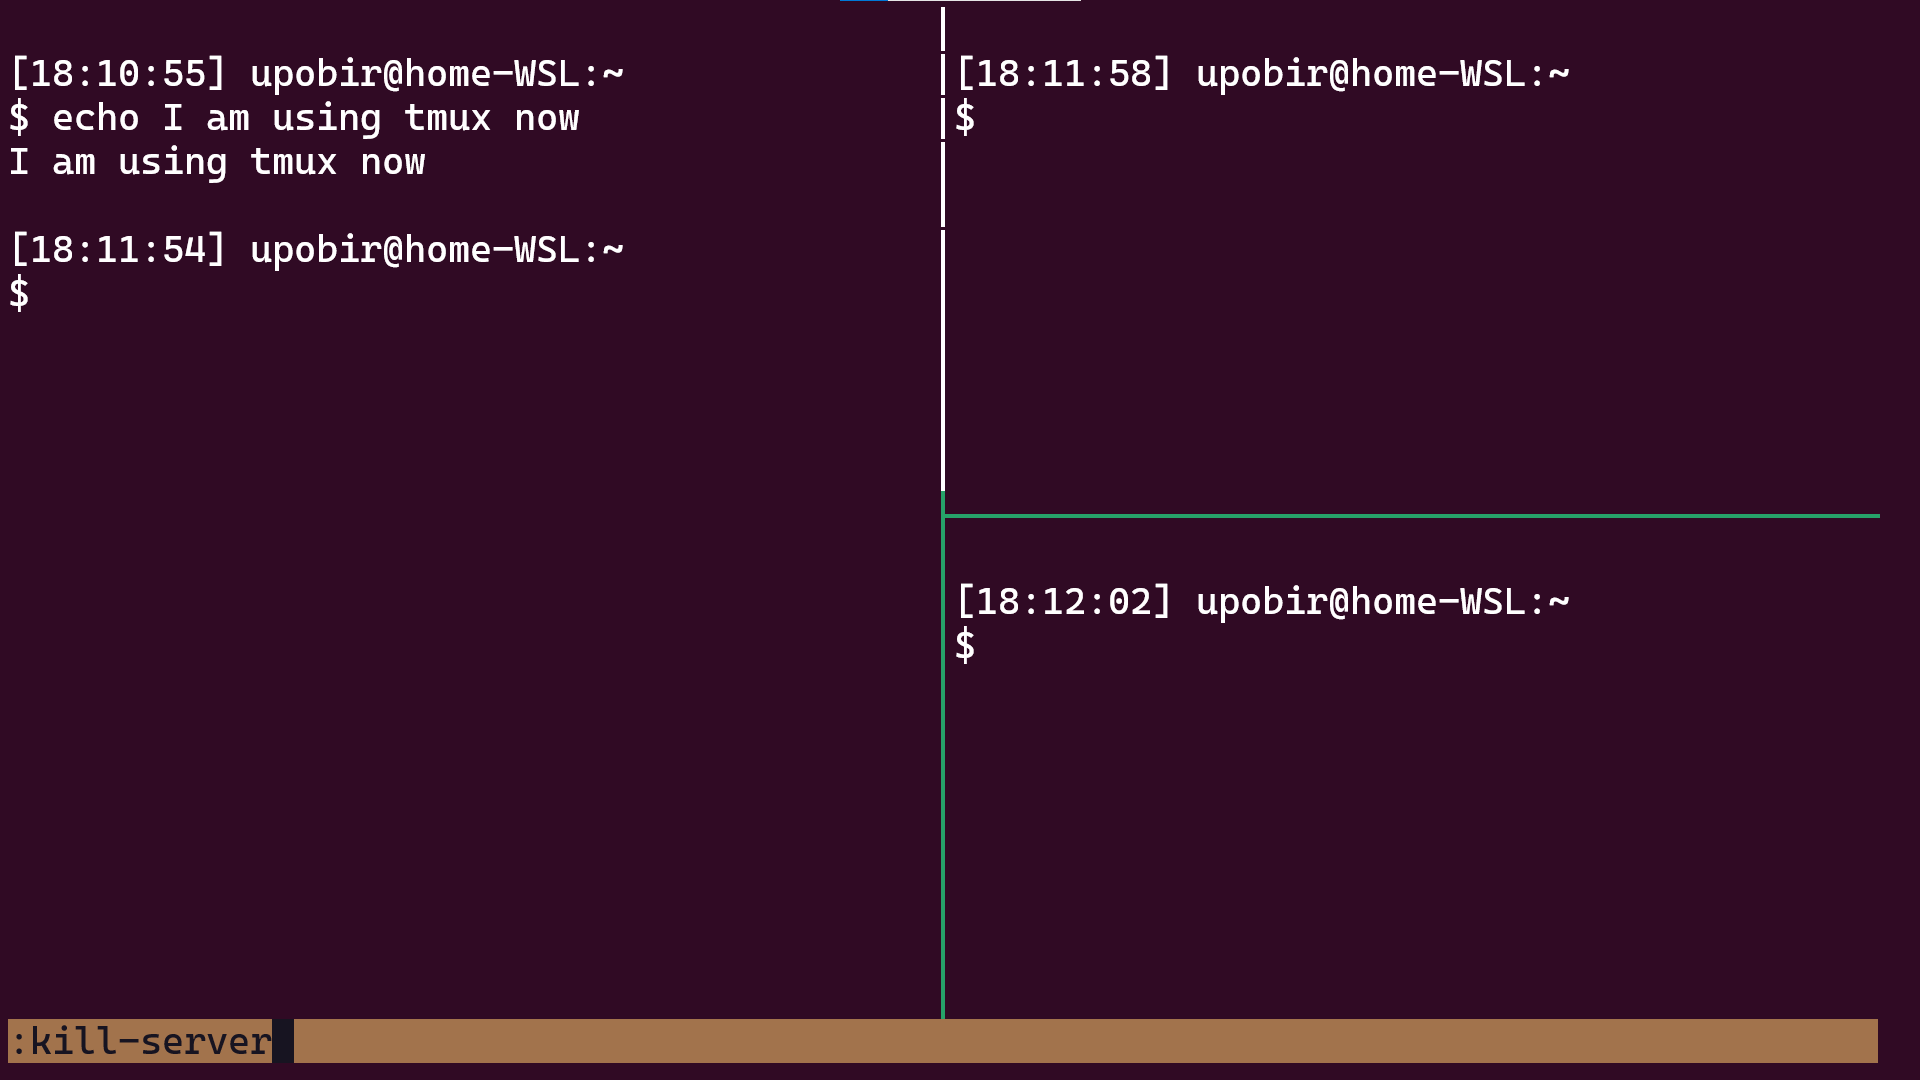 Killing the server (zoomed)
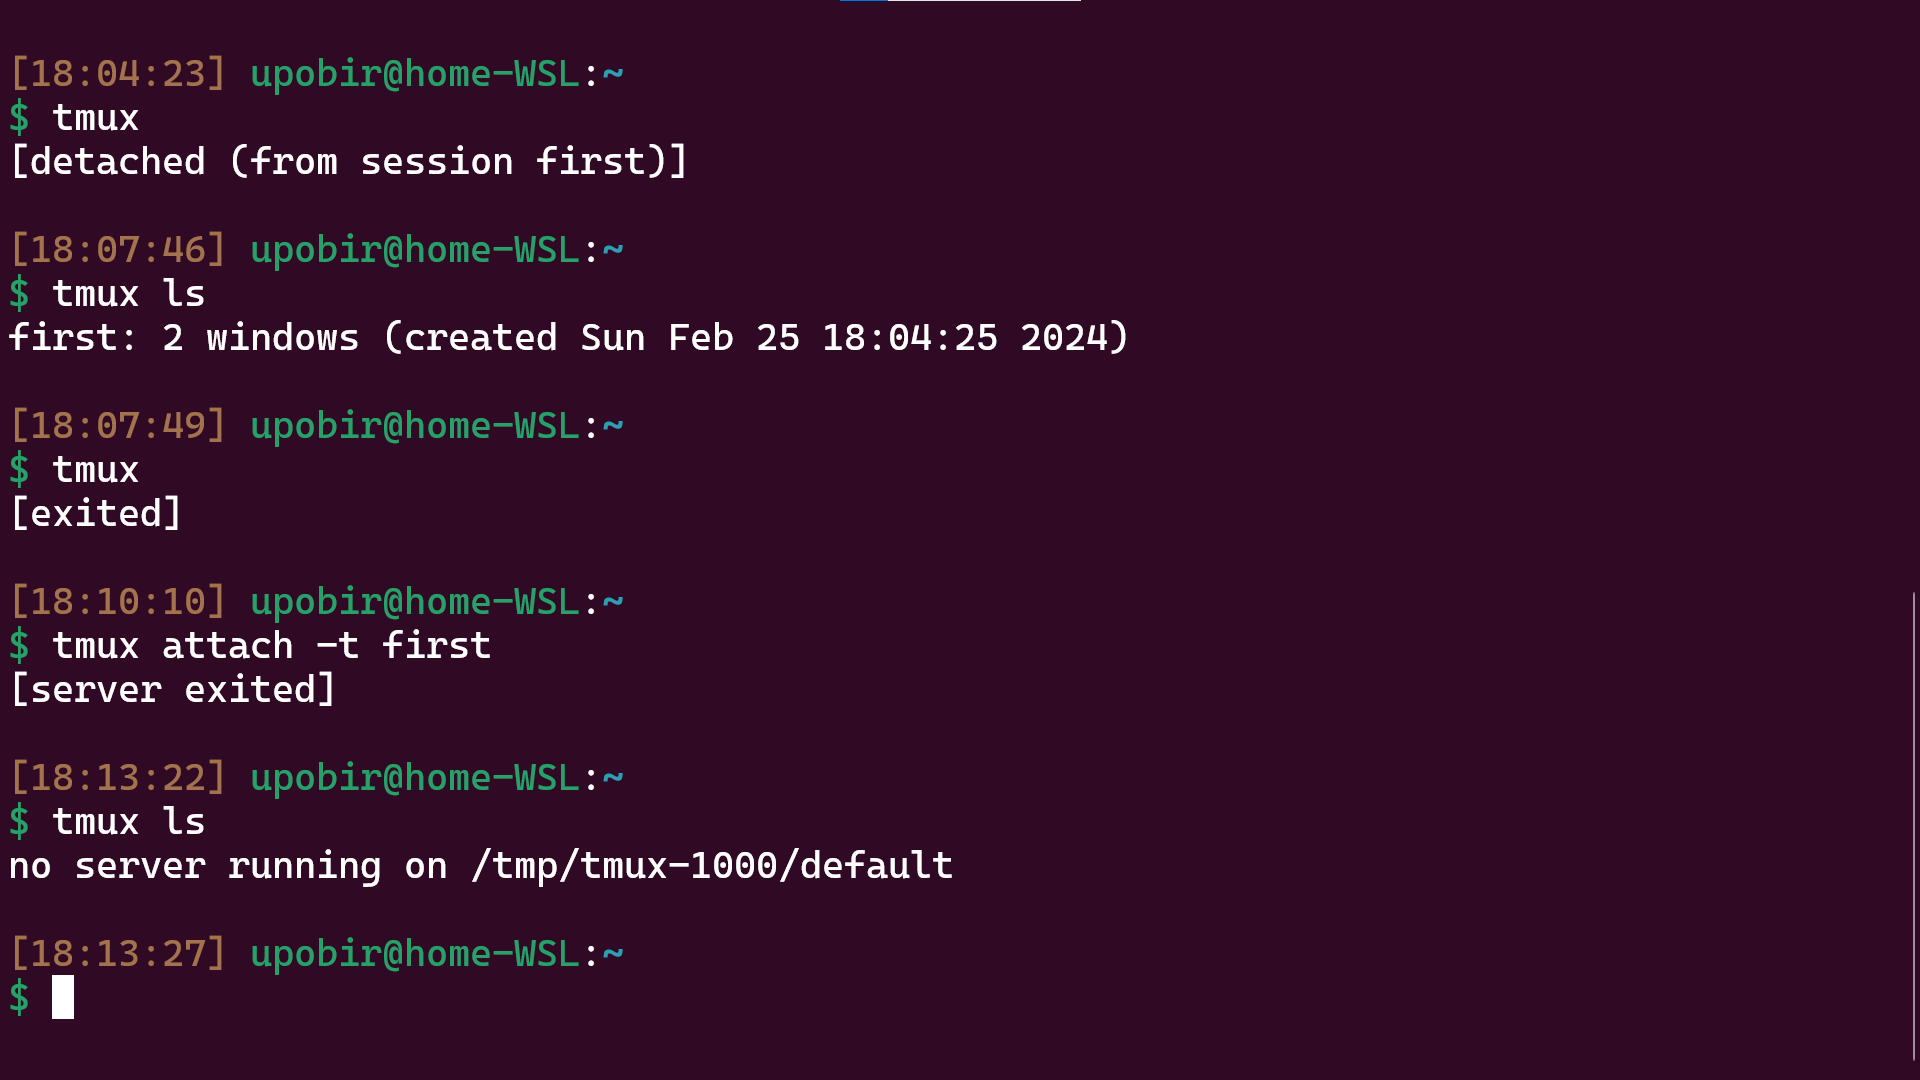 After killing the tmux server (zoomed)
Ok that was lots of instructions. Hopefully you got the gist of tmux, in fact you can already start using it with these instructions. But it’s a bit bland right now, we’ll see customizations in the last part of the article. Before that let’s try to dig deeper into the tmux interface.
Tmux commands: Tmux subcommands, command prompt, key bindings and Tmux scripts
So, in last section, I just gave you bunch of instructions and you did them to see various features. You might’ve noticed that we interacted with Tmux in several ways, sometimes calling Tmux subcommands, sometimes writing commands in the command prompt in status bar, and sometimes just running prefix key shortcuts. Broadly speaking, we can interact with Tmux using commands, and there are 4 ways to interact:
- Tmux subcommands, entered in the shell prompt or in shell script
- Tmux command prompt, in the status bar inside Tmux
- Key bindings inside Tmux, generally after pressing prefix key
- Tmux scripts or configuration files that can be sourced
I’ll go over these ways how they are related below.
First, and the most basic way is to use Tmux subcommands. For example when we ran tmux ls it was the list-sessions command (aliased to ls by default). You will note that we could run this command both inside tmux and outside tmux. In fact almost all tmux subcommands are like that, but of course some only make sense running inside, while some make sense only running outside. Another thing is that, all the shortcuts and command prompt stuff we did, all of them can be ran as Tmux subcommands! Here’s some of the relevant tmux commands would’ve been for stuff we did:
- Creating new window : prefix, then
c=tmux new-window - Renaming window : prefix, then
,=tmux rename-window <name>(the shortcut doesn’t exactly do this, we’ll see later) - Going to window 0 : prefix, then
0=tmux select-window -t 0 - Detaching from session : prefix, then
d=tmux detach - Creating new pane horizontally : prefix, then
%=tmux split-window -h - Creating new pane vertically : prefix, then
"=tmux split-window -v - Move to panes : prefix, then direction keys =
tmux select-panewith extra flag-U,-D,-L,-R - Terminating session : entering
kill-sessionin command prompt =tmux kill-session
Tmux subcommands are important to know cause, you might need them when writing your configurations. They’re also useful if you want to write a shell script to automate tmux stuff. But they’re unsuitable to use inside tmux, what if your current pane has some command running, so you can’t run tmux commands in the shell.
Second way is to use the command prompt inside Tmux. To access the prompt we press prefix, followed by :. In the command prompt, you can run the Tmux subcommands (no need to start with tmux). So you can enter new-window in the command prompt or split-window -h etc. The command prompt is also useful in the sense that you get tab completion (just hit tab). If you want to quit command prompt midway, just hit escape.
Third way to interact is the most important, key bindings. While inside tmux, several default shortcuts result in executing tmux commands. It’s as if when you hit the shortcuts, corresponding commands are run in the command prompt. These shortcuts can be normal button presses, or they can be button presses followed by pressing the prefix keys. In fact to see list of default key bindings run tmux list-keys, you will see a long list of lines starting with bind-key. This is the subcommand to create key bindings. For example, one of the output lines is
bind-key -T prefix , command-prompt -I "#W" "rename-window -- '%%'"
This means in prefix key table (i.e. after pressing prefix), when you hit ,, command prompt will ask for input (due to command-prompt -I) with default input value being curent window name (the #W) and whatever input you provide will be used to rename the window (input will replace %% in rename-window -- '%%' and this’ll be run in command prompt), the rename-window is also shown in prompt to signify that you’re writing part after that. Phew! that was complicated. But as you can see all key bindings are just some commands to be run in command prompt. When the key table is root, the key binding is for direct press, but when it’s prefix it means you need to press the prefix key first. There are also other modes like copy mode (we’ll look into coppying in the last section), copy-mode-vi etc. Another useful thing about command prompt is that if the command you wrote is an unambigious prefix of some command, Tmux will run that. So running new-w will run new-winow.
The final way to interact with Tmux is to via Tmux scripts. Officially, this is called Tmux configuration files. You can write list of Tmux commands (only the subcommands, tmux prefix not needed). and then you can source that file running tmux source <path-to-file>. This is of course intended to create feature like bashrc i.e. you create a config file which is sourced when starting the server. You can also create scripts that you think you need to run commonly and source them from command prompt. For example, here’s a possible Tmux script (note this will not work, if you do not have termdown installed):
split-window -v
select-pane -t 0
resize-pane -D 15
split-window -h

send-keys -t 0 "tail -f /var/log/syslog" Enter
send-keys -t 1 "htop" Enter
send-keys -t 2 "termdown" Enter
When sourced, the above file splits vertically, goes back to first pane, grows it downward a bit, splits horizontally and then sends three commands to the three panes.
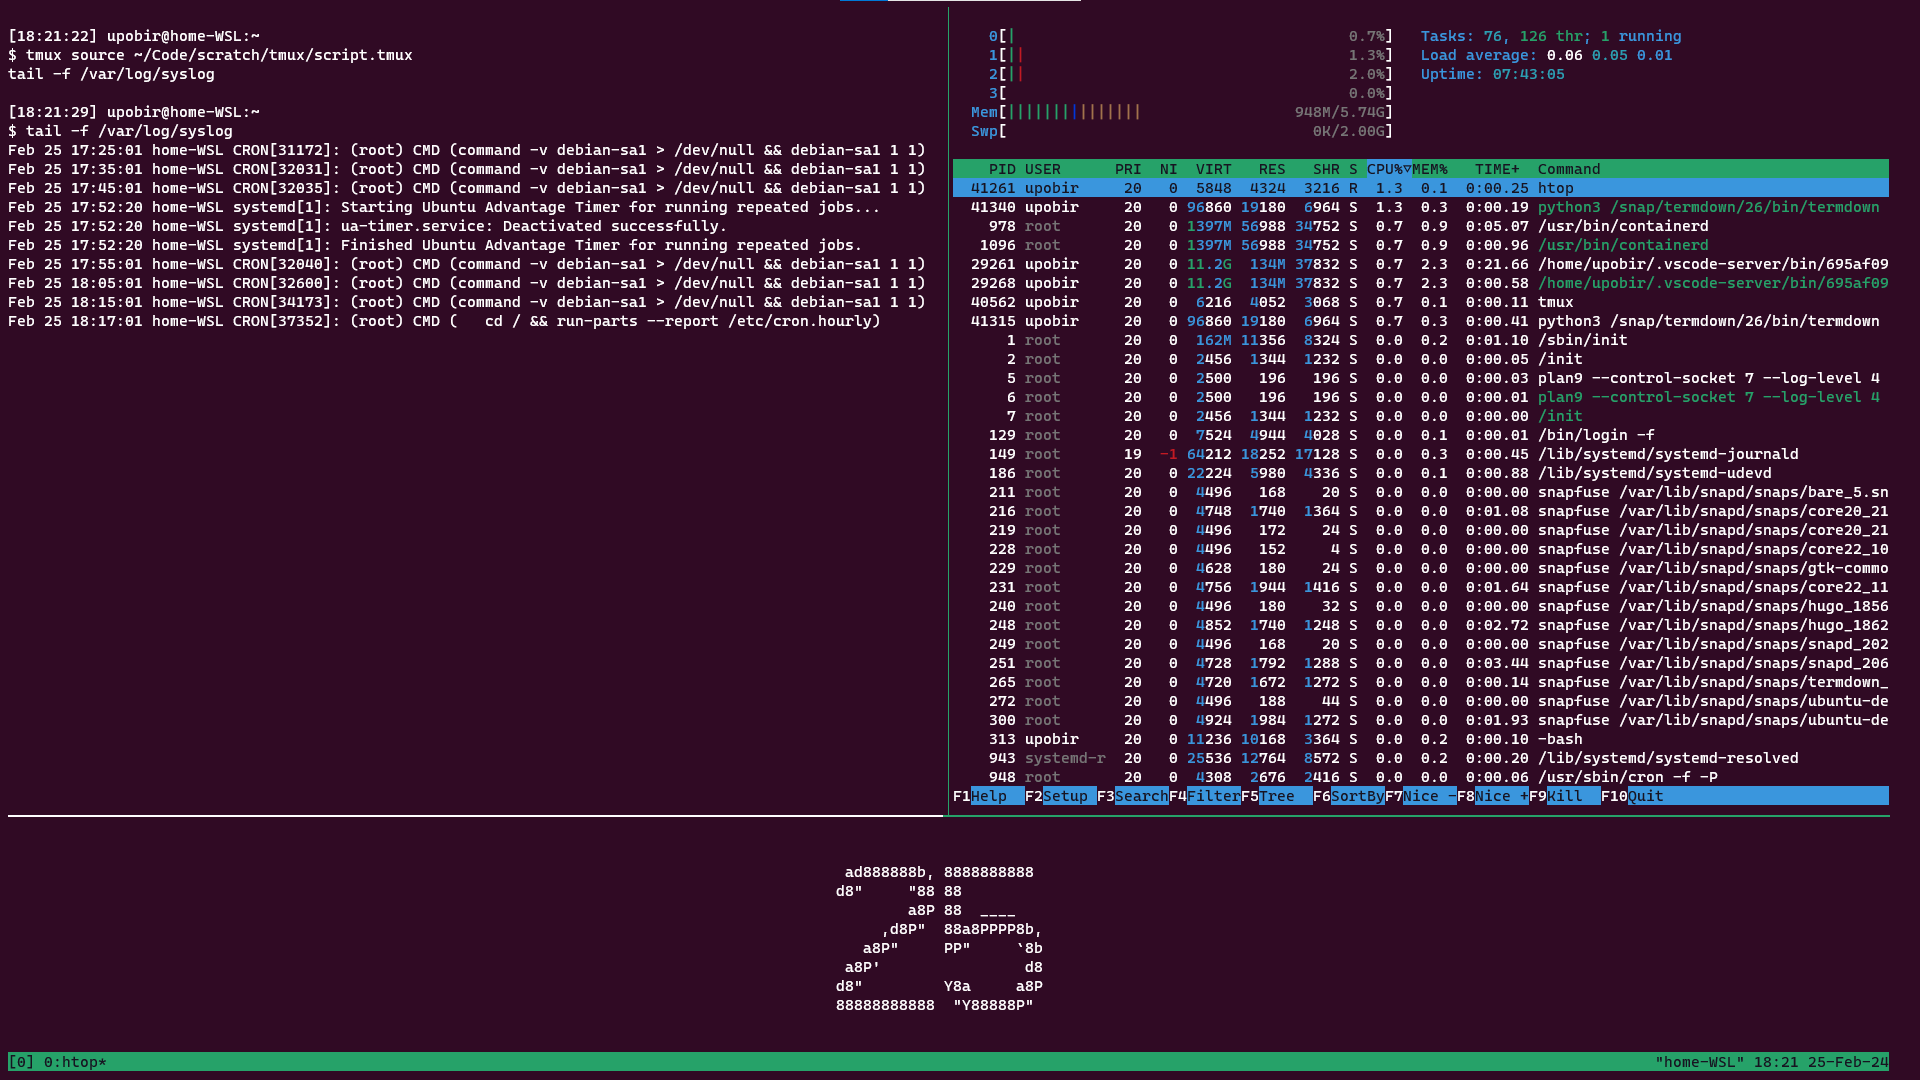 Sourcing the script above
By the way, if you intend to write lots of tmux scripts, try tmux source -nv <path-to-file>. This will only parse (not execute) the file and log out exact commands. So, if the script has resize-p, the command will log resize-pane, useful for debugging.
Configuring Tmux to be your own
The last section hopefully gave you a good understanding of how we interact with Tmux. Now if you start using Tmux, it will probably become a big part of your workflow. And then it’s important to customize it to be the most useful for you. When starting the Tmux server, Tmux checks for some configuration files, the order of searching can be found in the man pages. For now, just know that if there is a .tmux.conf file in your home directory, Tmux will source it. So we can put some useful things there such as new key bindings, some customizations etc.
The appearance and behaviour of Tmux is controlled by several options. We can set these options with tmux set-option with flags (-w for window, -p for pane, -s for server, default for session). Note some use set-window-option separate, but it’s same as set-option -w. Additionally the flag -g makes global option updates, which are inherited by newly created windows or sessions. Don’t forget to use the -g flag if you’re editing the .tmux.conf, since without it tmux will try to update “current” session, which doesn’t exist at the time of server startup. The list of available options is quite long, I’ll suggest go through the man pages.
I personally have made the following tmux file with help from internet and inspirations from Learn Linux TV’s video and NetworkChuck’s video. Note that I have not used proper flags to specify window or session options, because tmux can figure out which is which
# mouse support like clicking to select pane, scrolling, selecting text to auto copy etc.
set-option -g mouse on
# color in terminals, tmux needs screen terminal or derivative for proper functioning
set-option -g default-terminal "screen-256color"
# indexing will start with 1 for everyting
set-option -g base-index 1
# make status bar cyan colored, I like this
set-option -g status-bg cyan
# center the window names in status bar
set-option -g status-justify absolute-centre
# set base index but for panes
set-option -g pane-base-index 1
# set copy mode to use vi mode
set-option -g mode-keys vi
# set current window's bg to be yellow in status bar, again I like this
set-option -g window-status-current-style bg=yellow

# pressing prefx + r reloads .tmux.conf, displays a message to show it to
bind-key -T prefix r source-file ~/.tmux.conf \; display-message "Config Reloaded..."
# following two make newly created panes in same path as current one
bind-key -T prefix  %  split-window -h -c "#{pane_current_path}"
bind-key -T prefix '"' split-window -v -c "#{pane_current_path}"
# following four allow navigating panes with just alt + direction, no prefix needed
bind-key -T root M-Left select-pane -L
bind-key -T root M-Right select-pane -R
bind-key -T root M-Up select-pane -U
bind-key -T root M-Down select-pane -D
# pressing prefix + j will prompt to move current pane to another window
bind-key -T prefix j command-prompt -p "select window:"  "join-pane -t :'%%'"
# pressing prefix then S (captial s), prompts for window to swap
bind-key -T prefix S command-prompt -p "select window:"  "swap-window -t :'%%'"
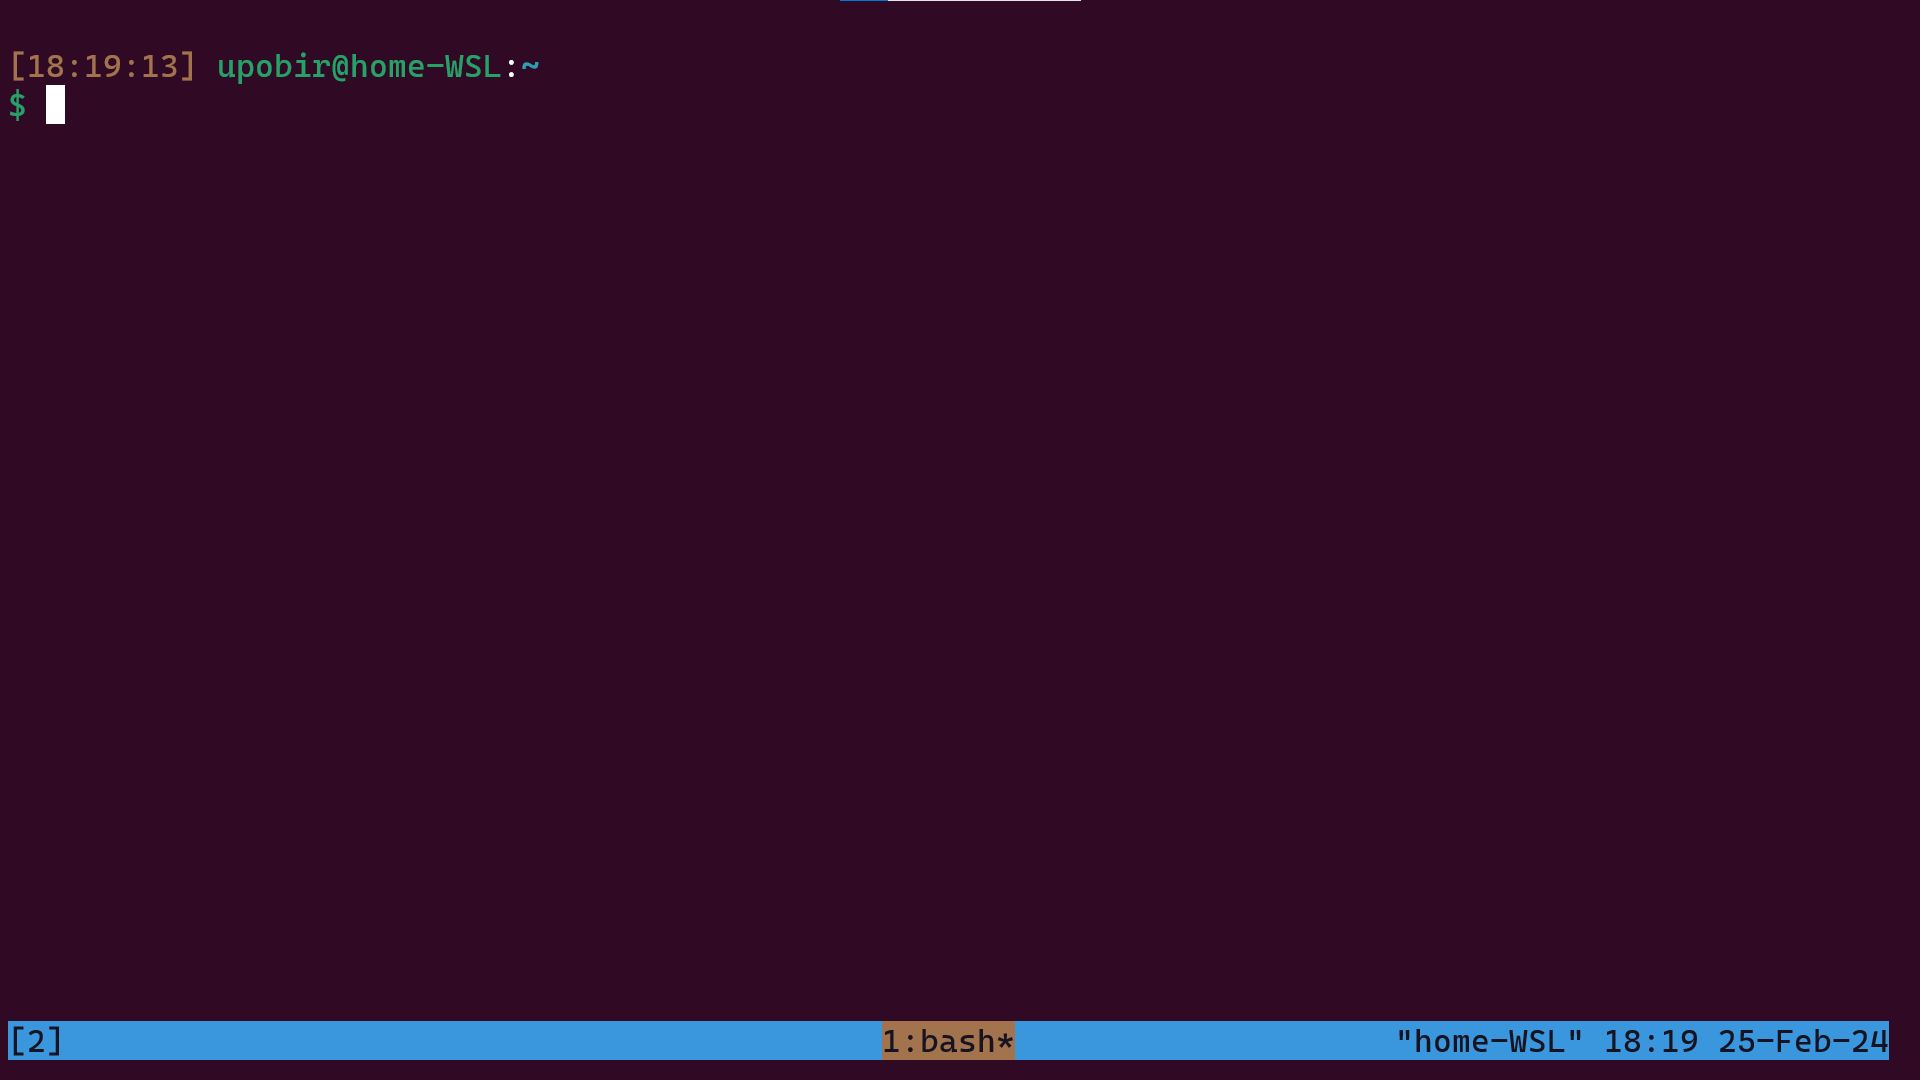 My Tmux view (zoomed)
Among these, the copy mode is important, the need to copy text from terminal is very frequent, you can just select the text to copy (thanks to mouse option). Or you can also press prefix then [ to go to copy mode, move in vi mode, press space to start copying and press enter to copy and exit copy mode. The last option makes swapping windows easier, but when the index you want to move your current window to is not in use, you have to use move-window (prefix, then .).
Finally you can also customize and set some other prefix key, many people do that. You can do something like set-option -g prefix C-f to make ctrl+f the prefix key, and additionally keep a secodn prefix key. But I think C-b is fine for me. Hope you can customize Tmux too now!
Conclusion
This was a big article. Hope I could get you to understand Tmux a bit better. If you are serious about using Tmux, I’ll suggest to go throught the man pages more and seeing other people’s configs. Before ending the article, here’s a simple quiz, if you need to press the prefix key for the terminal itself, what will you do? i.e. You want to send the ctrl+b button click to the terminal, not the Tmux. The answer’s quite easy, just read a bit of the man pages ;)
I try to share things that I have learnt recently, and in the process, I can obviously make mistakes, so if you think you found something wrong feel free to create a issue in the github repository for this blog.